Pumpkin Cheesecake

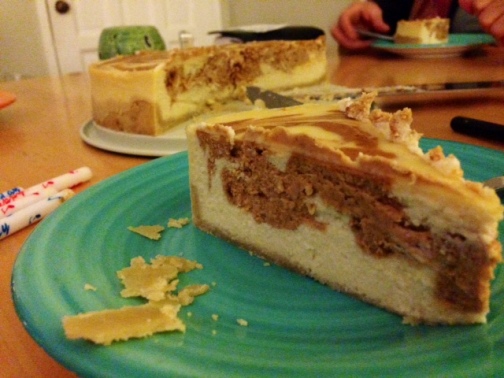
When your sister requests a pumpkin cheesecake for her birthday, you are not NOT going to make a pumpkin cheesecake. Even if you don’t have the correct size springform pan. Even if you do not have a KitchenAid. If a pumpkin cheesecake in the middle of February seems wrong, I am here to tell you that there is no wrong time to make and eat a pumpkin cheesecake.

Image

pumpkin cheesecake and moscow mules

I had my friend Martha Stewart (just kidding, she is not actually my friend, I just used her recipe) help me out with this one, and of course there were a few tweaks made. After spending to much of my time at Whole Foods lamenting over the inability to buy individual sticks of butter, I was finally ready to start the process.

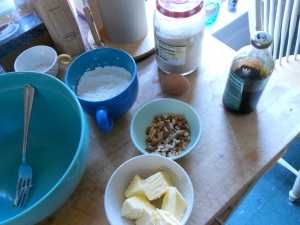
First, the crust. Not a press in crust made with store bought cookies, but a roll-out-yourself crust made from scratch and tasting faintly of sugar cookie. As in, I would make this crust into cookies and eat them.

Ingredients (for crust)

  • 6 T unsalted, softened, butter
  • 1/3 C sugar
  • 1 egg yolk
  • 1 t vanilla (or a dash more, if you are me)
  • 1 C flour (yes, I used white AP flour)
  • dash o’ salt

Method (the original recipe instructs one to use a stand mixer. I however mixed by hand, while standing)

  • cream the butter and sugar in a large bowl until light and fluffy.
  • mix in egg yolk and vanilla.
  • add flour and salt and mix until the dough just comes together. flatten into a disk and wrap in wax paper and refrigerate at least 30 minutes, or up to overnight (because of my time crunch I went for 30 minutes)

Part II.

When rolling out crust I like to do it in between 2 sheets of lightly floured wax paper. 1) it prevents a huge mess on the counter 2) it makes transferring it into a pan slightly easier.

  • lightly butter the bottom and sides of a 10″ springform pan. Preheat oven to 350.
  • in between 2 sheets of lightly floured wax paper, roll out the dough into a 10″ disk, about 1/4 of an inch thick. This should fit nicely into the bottom of your 10″ springform pan. Or, if you are me, it will fit more than nicely, with a little bit of extra going up the sides.
  • freeze the crust for 15 minutes. Then bake for 12-15 minutes until its “firm and pale golden”
  • remove from oven and let cool (completely is ideal, or nearly completely will work too)

Part III. The filling. Where the ancient electric hand held mixer begins to smoke and smell really funny.

Image

2 batters

Ingredients

  • 1 C pumpkin puree (I used the canned variety)
  • 1.5 t pumpkin pie spice (in retrospect, MORE)
  • 2.5 lbs cream cheese at room temp (or, if whole foods is out of CC, 2 lbs CC and .5 lb neufchatel cheese)
  • 1 3/4 C sugar
  • 1/2 C flour
  • 3/4 C sour cream (any ideas for what to bake with leftover sour cream?)
  • 1.5 t vanilla
  • 1/4 t salt
  • 5 eggs

Method

  • preheat oven to 325. wrap the outside of your pan with 2-3 layers of aluminum foil. this is to prevent water from seeping into the pan when you bake your cheesecake in the water bath. the water bath adds moisture in the oven and helps prevent cracks. also grease the sides of your pan once more.
  • in a small-er bowl mix pumpkin puree with spices. set aside.
  • cream the cream cheese until light and fluffy. this need not be an arduous process if you have the proper mixing equipment.
  • gradually add the sugar and flour until smooth. add the sour cream, vanilla and salt mixing until incorporated. add the eggs one at a time until just combined. be careful not to over mix. over mixing once the eggs are added introduces more air into the batter, which makes it more crack-prone once baking.
  • stir 2 C of cream cheese mixture into the pumpkin mixture.
  • pour most of the cream cheese mixture into your cake pan. use a spoon to dollop the pumpkin mixture all over. top with a few spoons of cream cheese mixture. use a butter knife to swirl everything together in figure 8 patterns. if you over-swirl, you will end up mixing everything together. you really just want the top to look pretty.
  • put the cake in a large, shallow roasting pan, and fill with 2-ish inches of boiling water. bake for 55 minutes to an hour (or more if needed) until the cake is set with a slightly wobbly center. turn off the oven and crack the door, letting the cake sit for an hour. remove from oven (at this point i removed took the cake out of the water bath and removed the foil) and chill on the counter top for another hour. you will see the cake shrink slightly away from the sides of the pan. after the hour I removed the sides of the pan and put the cake in the refrigerator for 3 hours until we sang happy birthday.

Image

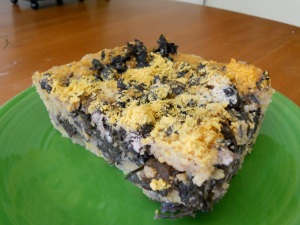
the cake was a great success. I loved the crust so much that I may use it for pie at some point, I wish it was thicker than 1/4 inch. The cake itself was great and not overly sweet, but I would have liked more of a pumpkin flavour (yes, flavour with a ‘u’). I think more spices and perhaps more pumpkin puree would have done a nice job. In fact, some cinnamon in the crust would have been great. I’ve also got some leftover filling since my pan was small than 10″, so perhaps mini cheesecakes are on the way.

No Longer a Student. And Spiced Molasses Chocolate Chip Cookies.

One day and one week ago I walked across the stage at Memorial Stadium in the clusterf*ck that was General Commencement. 6 days ago I walked across the stage at Zellerbach Hall in the well organized Sociology Commencement.

DSCN3133

I don’t think it ever quite “hit” me that I go to the best public school in the country, and then, whoa its graduation?! I am no longer a student; that piece of my identity has, for the time being ended. Of course this does not mean I stop learning and reading. In fact, I feel that most of my learning at Berkeley has taken place outside of the academic classroom, be it through friends or extracurricular activities. And, since I will keep reading about things I like, I can continue to build up my knowledge base until I go back to school in a couple of years from now. This is a strange, liminal, in between stage of my life at the moment. I have summer work, and then…ummm….uhhh…what do I do? That is the next adventure which awaits I suppose.

A while ago, when I was feeling nervous and uncertain and a little bit “empty”, someone asked me: “if there was a hole in the ground, and you had to fill it, what would you use?”. Well, dirt obviously. “Dirt, why dirt?” ummmmm…”Dirt because you have to fill the hole with the same stuff that it is made of” And so, over the past few years I have been filling up my empty with the same stuff that I am made of. And I am no where near complete, and I will continue to figure out what substance my dirt is made of.

I can list a few things. I am made up of sugar and flour and chocolate and butter because I like to bake. I filled with fresh fruit and vegetables because I am vegetarian and I value sustainable and ethical eating choices. I am made up of my bike because I like to go exploring the city on my bike. I am made up of adventures and excursions because I like seeing new things and new places. I am made up of words and sentences because I like to read and write (I suppose). I am made up of values and morals, because I think about the lives of others whether immediately in my life, or somewhere far off making the things I use. I am made of lots of questions and some answers and compassion. I am made up of laziness and tiredness because sometimes I like to take the easy way out. I am made up of some insecurities that sometimes make me jealous of other people. I am made up of all the people I have met these past two years, and years before that, because the self is shaped by others.

It is scary having this gaping hole of “time” now that I am done with school, and this hole will be sometimes empty and sometimes full. I don’t like the empty because it feels insecure, unsteady, unsettling. I don’t really know what I would like to do, which is the biggest gaping part of said hole. And, it is my choices that will determine what, exactly, gets to fill it.

And now, cookies.

My parental unit arrived on a Friday night, and like a good daughter, I wanted to serve them tea and cookies. And so, cookie making on a late friday night it was. (Bonus, they were still warm when my parents got here).

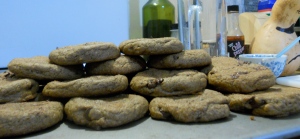
I settled on chocolate chip molasses cookies that I adapted from Averie Cooks. I made these over winter, they turned out delicious in my opinion, yet too chocolatey and too sweet in my parents opinion. So the following version omits some sugar and some chocolate. Admittedly, the following version allows the spices and molasses flavors to shine through, instead of being smothered by chocolate, which was very nice. I also used “heaping teaspoons” for the spices because, well, I love those warm, cinnamon-y spices. I also apologize for the poor quality photos; crappy kitchen lighting+crappy camera=crappy quality.

DSCN3116

Ingredients:

  • 1/2 cup unsalted butter. melted.
  • 1 egg. (preferably from the farmers market 😉
  • 1 cup sugar (fair trade, organic)
  • 1/4 cup molasses
  • 2 T oil (I used applesauce instead because I had a bit sitting around)
  • 1/5 t vanilla
  • 1 t cocoa powder
  • 2 t cinnamon
  • 1.5 t ground ginger
  • 1 t cloves
  • .5 t salt
  • 2 1/4- 2 1/2 cups AP flour
  • 1/5 t baking soda
  • 3/4 cup semi sweet chocolate chips
  • Coating: 1/4 c sugar, 1/4 tsp each of cinnamon, ginger, and cloves

DSCN3102

Method (for about 18 cookies)

  • After you melt the butter, allow it to cool slightly before adding in the egg. Otherwise, you will get scrambled egg cookies. So, add the egg, sugar, molasses, oil, vanilla, cocoa, cinnamon ginger, cloves, and salt. whisk ’til smooth.
  • add the flour and baking soda. stir to incorporate. Start off with 2 14 c flour and add a little more if needed (depends on the type of flour and on weather). I used half white and half white whole wheat flour, so I stayed at around 2 1/4. The batter will, and should, be thick, but pliable.
  • add the chocolate chips, and stir to just incorporate. roll the dough into a ball, wrap it with wax paper, or just cover the bowl with a towel and refrigerate for 2 hours. Or, up to 5 days. (If you plan to store it for more than a few hours, I would recommend storing in an airtight container)
  • when you are ready to bake: preheat the oven to 350. grease your cookie sheets!
  • make your coating in a small bowl by stirring the sugar and the spices. get the batter out of the fridge.
  • use your hands (or a scooper) to make walnut sized balls and roll them around in the sugar coating.
  • place them on the tray about 2 inches apart and flatten them slightly (not all the way though. they should bake slightly domed up)
  • bake for 8-9 minutes. It is important to NOT over bake because you want that nice, chewy texture. I usually just do 8 minutes since the cookies continue to bake a little once out of the oven, and they will harden as they cool
  • Once you pull them out of the oven, use the back of a spoon to tap the cookies flat. This will also crinkle the top of them, which looks pretty.

DSCN3106

Liking the bowl was delicious. And, my parents approved. Success.

Vegan Peanut Butter Cups

I am going to see my friend’s performance tonight, and it would be quite rude to show up empty handed, especially since the tickets were generously given to me for free. Flowers would be nice, but to generic. Said friend is a chocoholic and a vegan, and so I thought making something chocolatey would be nice.

DSCN3083


I also woke up today with excruciating neck pain due to a spasm that I had overnight, apparently. I vaguely remember waking up and possibly hearing something strange from my neck/shoulder area and feeling it do something strange. In other words, the mobility in my neck has been reduced to nearly nothing. So, I needed a recipe that was a) yummy and b) minimally laborious. Enter peanut butter cups which require only melting chocolate, mixing up peanut butter with sugar, and piecing it together.


DSCN3071


A quick google search yields loads of recipes and most follow the same basic pattern, which I will explain below. I based mine on this recipe, with a few additions such as cinnamon and vanilla and coconut oil.

DSCN3081Ingredients (for 12 PB cups, but I halved it to make 6 PB cups)

  • 12 oz vegan chocolate chips (+/- some depending on how thick you make your chocolate layer)
  • 2 T coconut oil
  • 1 C natural unsalted peanut butter
  • 1/2 C powdered sugar
  • pinch o’ salt
  • dash vanilla
  • dash cinnamon
  • cupcake liners and a cupcake pan

Method

  • line a cupcake pan with the liners. I had aluminum ones on hand and they worked fine. I am pretty sure paper ones would be great too.
  • Melt the chocolate chips in the microwave or in a double boiler. Once melted, stir in salt and coconut oil.
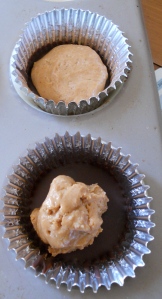
  • Coat the bottom of each liner with chocolate. I would say about a spoonful of chocolate in each one. Spread it out with a spoon and shake the muffin pan to get it evenly distributed on the bottom. Once all 12 are coated, stick it in the freezer.
  • While the chocolate is hardening, in a bowl mix together peanut butter, powdered sugar and a dash of cinnamon–maybe 1/4 teaspoon. Or more, if you, like myself, like the cinnamon chocolate PB combo. This will soon become thick, which is what you want.
  • Once the sugar has been mixed in, use your hands to roll balls of peanut butter and then flatten them into disc shapes. Get your chocolate from the freezer and place the disk-shaped PB on top (see the photo above)
  • The final step is dribbling the rest of the chocolate over the PB as a final layer. (You may need to remelt your chocolate to make it easier to spread. And if you run out of chocolate, never fear, just melt more) Use a spoon to drop spoonfuls on top of the PB, and again shake the muffin tin to evenly spread it out. Put it in the refrigerator to harden. Lick the bowl.
  • When eaten at room temp, the chocolate is nice and melty, which is very delicious. So take them out of the refrigerator a few minutes before you plan to consume. Alternatively, you could eat them frozen, which is good too.

DSCN3090


Strawberry Oat Bars

DSCN3053

The last day of my senior seminar consisted of presentations and food. My project was a map of fruit trees and convenience stores along Telegraph Ave. Here is a snippet:

Given the initial inspiration from LA based Fallen Fruit, our map focused on the blurred boundaries between public and private space through comparing fruit trees and convenience stores. Our data for convenience store locations came from driving along Telegraph. Conversely, our data for fruit trees came from publicly created and shared maps that reveal the whereabouts edible sustenance.

The layers on our map are an attempt to portray the city as an orchard. Peeling back the top layer, all you see is a multitude of trees (and stores). Without streets to directionally guide you, you are left lost between an edible, urban forest. Furthermore, the color scheme mimics a tree and mirrors where most of the bounty is concentrated.

If we reimagine public space as a space that can provide food, it might be part of a solution to creating a more equitable food system where fresh produce is accessible to people of all socioeconomic backgrounds. It would also be beneficial to residents that live in environmentally degraded areas because of the ecosystem services that trees provide. Fruit would be just a few blocks away, and free for picking. Trees could be taken care of by the community, and provide nourishment for anyone who wanders through.

The food we brought in, ideally, was to be related to our project (props to those that talked about bars and public intoxication and brought in beer for all. I think all seminar presentations should include libations since they take the nervous edge off). So naturally, fruit (not beer) fit in with our project. However, bringing in just fruit would have been boring and of course I wanted to incorporate fruit into a baked delicacy. I was planning to make Peach Crumble Bars, but strawberries (weekly special) were a good deal cheaper than peaches. Therefore, I settled on Strawberry Crumble Oat Bars instead. It seems that any fruit would work in a bar form, but the spice combination would probably have to change. For instance, cinnamon, nutmeg, cardamom, etc would not pair well with tart berries (or would they…?)

I adapted this recipe from Smells Like Home but I found that this makes more than 9-12 bars. Unless they are huuuge bars. I also added oats to the final crumb topping, which are not included in that recipe. And instead of using 1 C of butter, I used 1/2 C butter and 1/2 C coconut oil. And I added a spoonful of Vanilla to the strawberry mixture!

Ingredients

  • 1.5 C sugar, will be divided 
  • 1 tsp baking powder
  • 3 C AP flour
  • 1/4 tsp salt
  • lemon zest from 1 lemon (or a bit more)
  • 1/2 C butter, cut in pieces
  • 1/2 C coconut oil
  • 1 egg
  • 4 cups strawberries, sliced. Better yet, get someone else to do the tedious, labor intensive slicing for you
  • 4 tsp cornstarch
  • 1 tsp vanilla
  • lemon juice from the above lemon (or a bit more)
  • 1/2 cup oats

Method

  • 375 degrees for the oven. 9×13 inch pan should be greased
  • In a bowl, combine 1 cup of the sugar with the baking powder, flour, salt, and lemon zest. Mix it with a fork. Inhale, because it smells really good.
  • Add the butter and coconut oil, and the egg and use your hands to break up the fats until you are left with what looks like course crumbs.
  • Press-in slightly more than half of said “crumbs” onto the bottom of your pan.
  • In another bowl, combine rest of your sugar (thats 1/2 cup) with the lemon juice, cornstarch and vanilla. Add the strawberries and stir well. Make sure the cornstarch isn’t clumpy.
  • Spread the strawberries on top of layer 1 in the pan. I did not use whatever juices appeared in the bottom of my bowl.
  • Add the oats to your remaining crumb mixture, and stir well. You could also add a touch of vanilla if you want.
  • Sprinkle the oaty goodness on top of the strawberries.
  • Bake for 45 minutes–should be slightly golden on top. Your house will smell amazing. You may want to let it cool before slicing so that the bars don’t fall apart. They are delicious if still slightly warm, and a bit of ice cream might go a long way.

DSCN3057 DSCN3060

New Fave Food. Kinda

DSCN3044This.

I have never been a fan of the boxed variety of mac and cheese, and I was not subject to it as a small child. Mac and cheese is not generally a food that my parents made or were drawn to, since they are not from here. I vaguely remember tasting the boxed variety at a friends house and thinking it was gross, and since then, I “didn’t like mac and cheese”. But no one doesn’t not like mac and cheese. Rather, one might not like the boxed variety.

My first positive mac and cheese memory was also at my friends house. I was a little suspicious and scared when she told me her mom was making mac and cheese for dinner and that it was “so good!”. I was expecting another meal from a box. But alas, I was very wrong. Her mom made baked mac and cheese, from scratch, with crunchy bread crumbs on top and ooey gooey creamy-ness inside. Since then, I liked mac and cheese, but only real mac and cheese.

Its not a food I make often because the ingredients are rather expensive and I wont buy a 2 lb block of generic cheese. When making it at home, I had been experimenting with vegan versions made of nutritional yeast, silken tofu, and an assortment of spices. I have had some successes. And now, living in the bay area, it is rather easy to obtain vegan mac and cheese that makes my heart sing. Both Homeroom and Souley Vegan have versions of the dish, and the Souley Vegan kind can also be found in the ready to go refrigerator at several grocery stores.

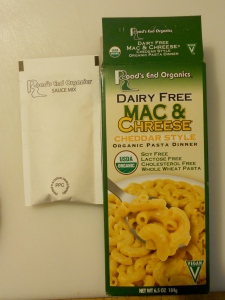
When I found this vegan boxed version on the shelf, my curiosity got the better of me. I had used “chreese” sauce before and I knew it tasted good. So why would this not taste good? Chrees-y sauce AND whole wheat macaroni? Sold! (they also have a gluten free version and a mac and shells kind which is not whole wheat)

Its really easy to make: Boil water, Add pasta, Drain. Make sauce: water +powder+1-3T oil. Combine. I generally add some extra nutritional yeast, and I only use 1T olive oil.

Last night I had the genius idea of making this mac and cheese and throwing in the extra cup of pumpkin puree I had in my refrigerator from earlier this week. I omitted the oil from the cheesy sauce and simply used water+powder+pumpkin+extra nutritional yeast. It was FANTASTIC. The pumpkin made the mac and cheese extraordinarily creamy, and it also had the added benefit of some extra nutrition. And, it turned a brilliant shade of orange, reminiscent of fake cheddar cheese. I like the whole wheat macaroni because of the slightly nutty taste that it adds, and the grainy texture. So, if you are on a quest for a great boxed version of mac and cheese, yet suspicious what exactly powdered cheese contains, I would highly recommend this vegan version (+pumpkin). None of the ingredients are strange, its mostly a combination of spices, nutritional yeast, and cornstarch.

things that are supposed to be eaten out of bowls always taste better when eaten out of cups.

things that are supposed to be eaten out of bowls always taste better when eaten out of cups.


Chocolate Chip Cookies and last day of school

Today from 5-8 I have my last class of my undergraduate education. Whoa. It is a potluck. So naturally, like any other student (ok, maybe not like any other student) I decided to bake something. I was a little uninspired and wanted to go for something rather straightforward, especially because I did not have all that much time. Additionally, I was baking in the AM and they are going to be consumed in the PM, so they have to last aaaalllll day. So, whats something simple and sweet that everybody loves? Chocolate Chip Cookies of course!

I did not follow a fancy recipe. I picked up a bag of Ghirardelli semi sweet chocolate chips (because they are vegan/dairy free. Definitely not my chocolate chip of choice) and followed the recipe on the back. Why buy vegan chocolate chips if I am about to engulf them in butter and eggs? Because I have no idea what kind of diary they use, whereas I used Clover Organic Butter and Vital Farms Eggs, which all score highly on the Cornucopia Institute’s Scorecards. (note the scorecards tab in the upper right)

The 2 things that I did adjust from the recipe were: 1) instead of walnuts I used a combination of crushed salted peanuts and almonds and 2) I had no brown sugar so I added 1/2 a tablespoon of molasses. I also halved the recipe. I suppose the salt in the nuts means that these are now “Salted Nutty Chocolate Chip Cookies”.

Ingredients (for 2 dozen cookies) (adapted from Ghirardelli)

DSCN3030

  • 1 and 1/8 cup flour
  • 1/2 tsp baking soda
  • 1/4 tsp salt
  • 1 stick butter (1/2 cup) softened
  • 3/4 cup sugar
  • 1/2 Tbs molases (a little more or less will probably be OK)
  • 1 tsp vanilla
  • 1 egg
  • 1 cup chocolate chips
  • 1/2 nuts, chopped

DSCN3033

Method

  • preheat oven to 375
  • sift the flour with the salt and baking soda into a bowl
  • in a separate bowl, cream the butter with the sugar until its…creamy. add the molasses and mix it in
  • add the vanilla and egg and continue to mix until its all incorporated
  • add the dry ingredients (I did it in 3 batches) and keep on mixing until its all incorporated
  • fold in the chocolate chips and the nuts
  • taste the batter, of course. exercise self control and try not to eat the whole thing
  • drop tablespoon onto an un greased cookie sheet. I greased my cookie sheet. I also did not drop tablespoons of batter, rather I rolled tablespoon sized balls and slightly flattened them with my hand
  • bake for 9-11 minutes until golden brown. Always go for less time (9mins) if you are unsure because they will harden as they cool.
raw dough

raw dough

baked dough

baked dough

I have not yet tasted them (waiting for the potluck tonight) but they smelled amazing when they were baking. The cookie dough tasted good enough, and whats not to like about cookies? I’m hoping the salted nuts will act in my favor.

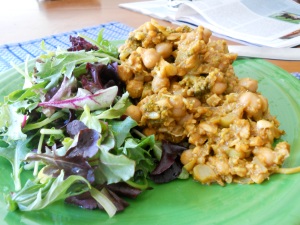
pumpkin tempeh garbanzo cinnamon spiced curry

This is one of my all time favorite and very easy to make dishes. Something about the spicy-ness of curry with the warm sweetness of the cinnamon makes my taste buds sing. Its delicious when eaten warm, and also doubles as a wrap filling the following day when its cold and leftover. You can use any type of bean (black, pinto, kidney, etc) and you could also play around with the veggies you decide to use. Carrots work well, as does kale. Broccoli is one of my favorites to use. Mushrooms not so much in this dish because they  release a lot of water and the consistency gets funky the following day.

DSCN2981 DSCN2979

If you have the time, you can cook your pumpkin from scratch. Just bake it in the oven and then puree it. Butternut squash works very well for this, as do yams/sweet potatoes. But, since I did not have time yesterday, I went for the canned variety of pumpkin.

Ingredients

  • 4-5 cloves of garlic, minced
  • 1 onion, chopped
  • ~2 teaspoons coconut oil
  • 1 bunch of broccoli, chopped into bite sized bits
  • 1 can beans of choice (garbanzo and black are my favorites)
  • 1 block tempeh
  • about 1 cup pureed pumpkin (canned) or pureed butternut squash or sweet potato
  • cinnamon, salt, and curry powder to taste
  • a touch of molasses (1 or 2 teaspoons) (optional, but tasty)
  • water as needed

Method

  • heat the oil in a pot. Brown the garlic and then add the onion. saute until the onion is starting to brown. 
  • add in the broccoli. you might have to add some water to the pot to prevent it from drying out. cover and cook, stirring occasionally. I like my broccoli on the mushy side, so I cooked mine for longer. If you are a fan of the crunchy broccoli, you clearly don’t need to cook it as long.
  • once the broccoli is at the desired consistency, drain and rinse the beans before adding them. crumble in the tempeh. cook this for 3-4 more minutes. again, you might have to add water to prevent pot-burning
  • add salt, curry powder, and cinnamon to taste. add the molasses too. Unfortunately I am completely unaware how much I used. Start with 1/2 teaspoon of each and go from there, is what I would say
  • finally, add the cup of pumpkin and a little more water. cook for another 4-5 minutes. The pumpkin will thicken as it cooks, so adjust with more water if you desire. Taste it again and add more seasonings if you wish.
  • enjoy warm right now, and in a wrap tomorrow!

its a wrap, folks! (punny, right?)

pumpkin curry

Polenta Bake with Beans and Kale

Image

I love polenta. I like it in mush form, when you just make it and its all warm and not shapely. I like it once baked and molded, like in the photo above. Its a perfect vessel for nearly any ingredient since its rather flavorless on its own. This recipe includes beans, mushrooms, and kale. It requires cooking polenta (from cornmeal), cooking some kale with onions, garlic, and mushrooms, and then combining them into a baking dish to pop in the oven. Its good when eaten out of the oven and warm, but today I ate it cold for lunch and it was just as tasty.

Ingredients:

  • 1 onion, chopped
  • 4 cloves of garlic (or more!), minced
  • 1 bunch kale, chopped or torn into bite sized pieces. I used purple kale.
  • dehydrated mushroom, soaked in water, then chopped. save the water! I used about 1/2 oz
  • 1 can of beans (black)
  • 1 cup of polenta (cornmeal)
  • 1 cube of veggie buoillon
  • 1/4 cup nutritional yeast, plus more for sprinkling

Method:

  • In a skillet (I used my cast iron), brown some garlic. Add the onion and saute until translucent. 
  • Once the onions are done (you can also brown them if you wish, but I was to impatient) add the kale and cook until its wilted down to about half its size, if not a little more. Also add your re-hydrated mushrooms at some point, once the kale is close to being finished. Add salt to taste. Set these veggies aside
  • In a separate pot cook the polenta. 1 cup of polenta needs about 5 cups of water. I used my mushroom liquid+water+veggie bouillon to cook my polenta. Click here for your basic polenta how to, butter being optional
  • Around the 15 minute mark, add the beans and nutritional yeast and cook for 5 more minutes. Add more water if it gets very thick, since nutritional yeast has a tendency to thicken it. Add salt to taste.
  • Once your bean/polenta is done, pour a little less than half into a lightly greased 9×9 inch ovenproof dish. A little bigger or smaller is OK too.
  • Add the kale concoction to the other half and mix it well
  • Pour the kale/polenta on top of the bean/polenta in the dish, and flatten it with the back of a spoon. You can also press it down slightly into the bean/polenta. Sprinkle some nutritional yeast on top.
  • Bake in the oven for 15-20 minutes at 350 degrees. Let cool slightly and solidify before slicing and serving.

DSCN2928

Soba Noodles with Peanut-y Tempeh

This is one of my favorite things to have. Garlic and onions go oh-so-well with mushrooms and tempeh. Buckwheat soba noodles have a way more interesting texture and taste than pasta.

Not your typical spaghetti with meatballs. Instead, its soba noodle and brussels sprouts

Not your typical spaghetti with meatballs. Instead, its soba noodle and brussels sprouts

Here is what you need:

  • 2-3 cloves garlic, minced
  • 1/2 onion, chopped
  • 1-2 teaspoons freshly grated ginger
  • dehydrated mushrooms, I used 1/2 oz i think
  • 1 package tempeh
  • brussels sprouts-1 bag frozen and cooked according to package instructions
  • soba noodles: 2/3 of a package
  • 1-2 Tablespoons peanut butter
  • lemon juice and soy sauce to taste, but I used about 1 large lemon and 2-3 Tablespoons of soy sauce

Here is how you make it

  1. Put your mushrooms in a bowl and cover with boiling water to rehydrate. Don’t throw out the liquid because you will use it throughout!
  2. Heat a teaspoon of coconut oil in a saucepan. When its hot, add the garlic to brown. Throw in the ginger and onions.
  3. Keep cooking the garlic/onions/ginger until the onions are soft and translucent, about 20 minutes. To prevent it from burning and sticking and drying up, add several tablespoons of the liquid from the mushrooms whenever you may need to.
  4. Chop the rehydrated mushrooms and add them in. Crumble the tempeh into the mixture
  5. Keep adding mushroom water as needed. Add the lemon, soy sauce, and peanut butter. You can adjust quantities to taste. Keep cooking for a few more minutes, until creamy and warm throughout.
  6. Cook your soba noodles and brussels sprouts according to package directions.
Final Tempeh Concoction

Final Tempeh Concoction

The Fungus Among Us

The Fungus Among Us


To Assemble

  1. I like to rinse a few handfuls of salad greens and place them in a large bowl
  2. While the Tempeh sauce, brussels sprouts, and noodles are still hot, add them directly on top of the salad greens. This will wilt them slightly
  3. Mix it all together
  4. Eat. With hot sauce if needed
  5. Get your other to do the dishes for you
Greens and Brussels Sprouts are your friends

Greens and Brussels Sprouts are your friends

Final Product

Final Product


cheese making and bread baking

Today I made some cheese. Farmers cheese which is somewhat soft and versatile due to its subtle flavor. I also had to make bread, because I needed something to put my cheese on and I needed to use some of the whey that was left over. Also, its been rather cold; turning on the oven warms up the kitchen and my bedroom quite nicely.

Lets begin: I went to whole foods to get some Straus Organic milk, because there is no other way that I would buy milk. (bonus: once I sanitize the glass bottle, it is the perfect vessel for my kombucha! note: I tasted the kombucha today and it is delicious. slightly sweet and a bit effervescent but it still needs 1 or 2 more days). Anyways, I bought a gallon of milk, and poured it into a large pot, along with a generous pinch of salt.

Image

milk in the pot. The yellow is the cream which has started to melt.

I boiled the milk until the edges started to bubble and it was just at boiling, reading 185-190 on a thermometer. While the milk was boiling, I squeezed 1/4 cup of lemon juice to have at the ready. Turning off the flame, I poured in the lemon juice, and gave it a stir. It started to curdle almost immediately, but I let it sit for 7-8 minutes to continue the process.

Image

The curds begin to form

While the milk was curdling, I lined a colander with some cheesecloth, and set it in the sink over a bowl (in order to catch they whey). Then, I poured everything into said colander/cheesecloth contraption. I let it drain for about an hour, with a weight on top, and gave it an occasional squeeze. The final product is below.

Image

cheese in the forefront. whey in the background.

Verdict: its really good. Very mild flavor, next time I will add more salt. It also has the potential to be flavored with some herbs and spices. I sliced some and ate it atop a salad with some balsamic vinegar and it was really good. It would make an excellent filling for lasagna, or ravioli, or on top of pizza. Or, on bread…

…I had a lot of whey leftover, and wanted to use some before storing it in the refrigerator. I had read that it can be used in place of water and/or milk in baking. Last week I made a whole wheat loaf adapted from the King Arthur website. I decided to go off of that recipe again, but adapt it to my whey. I replaced the water and evaporated milk with whey, and used half agave and half molasses for the sweetener. I also reduced the oil in the recipe from 1/4 C to 1/8 C.

Image

ready to go into the oven! note the bubble on top…

Image

final product! the apples and persimmon in the background are from the farmers market and are providing my kombucha some company.

http://allrecipes.com/recipe/home-made-farmers-cheese/ and http://www.kingarthurflour.com/recipes/classic-100-whole-wheat-bread-recipe